 Project view
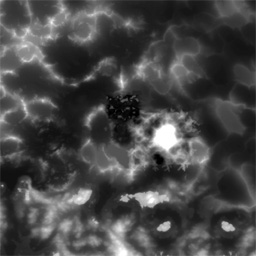
The project view ![]() gives the user a top down view of the scene. This view can be used for navigation purposes (middle clicking on the project view will navigate the user to the chosen point), or for generating a minimap. Each chunk is photographed and a copy of this photograph is stored in the chunks corresponding .cdata file and a compilation of all the chunks is written to the space.thumbnail.dds file located in the space fodder.
gives the user a top down view of the scene. This view can be used for navigation purposes (middle clicking on the project view will navigate the user to the chosen point), or for generating a minimap. Each chunk is photographed and a copy of this photograph is stored in the chunks corresponding .cdata file and a compilation of all the chunks is written to the space.thumbnail.dds file located in the space fodder.
The dimensions photographed by the project view can be modified by altering the space.settings file <bounds> tag, each number refers to an offset of chunks from the origin.
<bounds>
<minX> -10 </minX>
<maxX> 10 </maxX>
<minY> -10 </minY>
<maxY> 10 </maxY>
</bounds>
Warning: Modifications to the space.settings file will change the bounds loaded by WorldEditor and what chunks are loaded on the server.
Users wishing to get a higher resolution photograph of the terrain should consult the Python API reference manual (bigworld/doc/api_python/python_worldeditor.chm) for the function WorldEditor.photographChunk.
Creating heightmaps BigWorld's WorldEditor allows you to take advantage of 3rd party heightmap-editing tools to rapidly generate and refine terrain height.
There are many applications available that can create greyscale maps for representing terrain height. Some of them allow the user to simulate complex geographical processes, such as wind and water erosion. Some of the more powerful heightmap-editing tools include:
FantasyDemo's space heightmap was generated in World Machine and composited in Photoshop
You can find several example heightmaps in the fantasydemo\example_terrain_textures\ folder.
Heightmaps for level design prototypingThe heightmap feature can also be useful for blocking out areas during prototyping. Quick sketches in Photoshop can be imported into WorldEditor to check distances and lines of sight, and to adjust other design issues before world building begins.
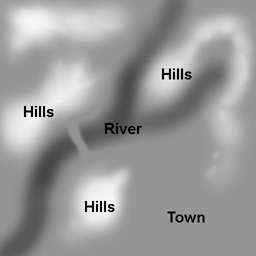
A quick sketch in Photoshop can help designers prototype terrain layouts.
Importing heightmapsThe Terrain Import/Export Tool toolbar button
( ) activates the Terrain
Import/Export panel, which uses the viewport to display an overhead
representation of the terrain height in greyscale.
) activates the Terrain
Import/Export panel, which uses the viewport to display an overhead
representation of the terrain height in greyscale.
The Terrain Import/Export panel's Import button allows you to import the following types of heightmap.

.raw (16bit)
.r16 (16bit)
.bmp (8bit/channel)
.ter (Terragen files)
.dt2 (DTED2)
 Be aware that when using lower bit
depth images (8bit), you will get terracing artifacts in your terrain, due to
the precision information stored in the 8-bit image. If you want to 16-bit
images by hand, Photoshop CS is capable of editing them.
Be aware that when using lower bit
depth images (8bit), you will get terracing artifacts in your terrain, due to
the precision information stored in the 8-bit image. If you want to 16-bit
images by hand, Photoshop CS is capable of editing them.
Once the file is imported, you can adjust the minimum and maximum height of the map, either via the Height fields or via its sliders.
The strength of the imported map can be adjusted using the Strength field/slider – this is similar to the Layer Opacity feature in Photoshop.
There are several options for how the imported height map is applied to the existing terrain
Replace: Simply swaps the existing terrain for the imported terrain. Commonly used to add features to the terrain but usually requires some clean up at the edges.
Add: Adds the two terrain values together
Subtract: Subtracts one terrain from the other.
Overlay: Values less than 128 are subtracted, values higher than 128 are added.
Minimum: Chooses the lowest value of the two heights. This blend mode is great for cutting away at mountains.
Maximum: Chooses the highest value of the two heights. Great for adding mountains to non mountainous areas.
The Alt keyboard shortcut sets the Height field's maximum
value to the height of the terrain clicked.
Handles on the imported heightmap allow the user to adjust the size of the
imported map. You can snap the handles to chunk boundaries (100mx100m) by
using the Shift keyboard shortcut.
The buttons on the bottom of the Terrain Import/Export group box allow you to rotate, flip, and mirror the imported map.
The Renormalise Colour button ( )
simply readjusts the levels displayed in the preview – it does not affect
the overall terrain height.
)
simply readjusts the levels displayed in the preview – it does not affect
the overall terrain height.
The way in which the new layer is applied to the terrain is configured via the Mode drop-down list box. These different mathematical instructions can be useful for adding features to already existing terrain. The Maximum option is great for adding mountains to your terrain, while Minimum is useful for cutting out canyons and rivers.
When you are satisfied with the outcome, click the Place button to place the terrain.
Exporting heightmapsTerrain height can be exported, which is useful for:
Moving existing terrain
features to different locations.
Exporting your world to touch
it up in Photoshop
Adding another erosion pass in
your favourite terrain-editing tool.
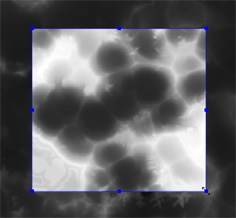
To export a heightmap, use the blue handles to select the area that you need to export, then click the Export button – this will invoke the Save As dialog box, where you can specify the folder and file name of the exported heightmap. We suggest using a 16-bit file type, as they do not suffer from precision artifacts found in 8-bit formats.
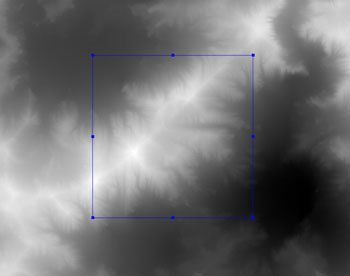
When a height map is exported it will generate an *.xml file for the purpose of remembering the exact position it was exported from. This allows the user to modify the map with the assurance that if re-imported it will automatically snap back to the same position.
<root>
	<export>
		<minHeight>	19.360001	</minHeight>
		<maxHeight>	299.880005	</maxHeight>
		<imageWidth>	779	</imageWidth>
		<imageHeight>	789	</imageHeight>
		<littleEndian>	true	</littleEndian>
		<left>	3.570073	</left>
		<top>	11.604759	</top>
		<right>	9.651198	</right>
		<bottom>	5.447620	</bottom>
		<absolute>	false	</absolute>
	</export>
</root>
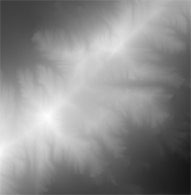
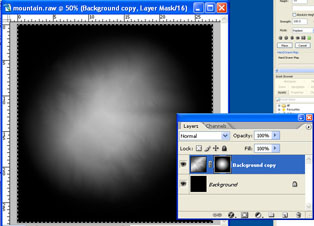
In the example above we have exported a section of mountain that will be edited in Photoshop so that it can be placed seamlessly elsewhere in the scene.
The file mountain.r16 must first be renamed to mountain.raw so that photoshop can open it.
Versions of photoshop later than 7.0 are required to edit 16 bit images
When you try to open a .raw file Photoshop will prompt you with a dialog requesting the dimensions, channel count, bit depth and byte order.
Dimensions : Can be found in the exported .xml file (see above)
Channels : should be set to 1 for .raw files
Bit depth : should be set to 16 for .raw files
Byte Order: IBM PC
Once inside photoshop we are going to take the mountain image and darken its edges using a mask. This will prevent hard edges in the terrain when we import the texture. The image below is a before and after shot of the exported terrain with a black border mask.
The image is then saved as a .raw file with the same options used during open.
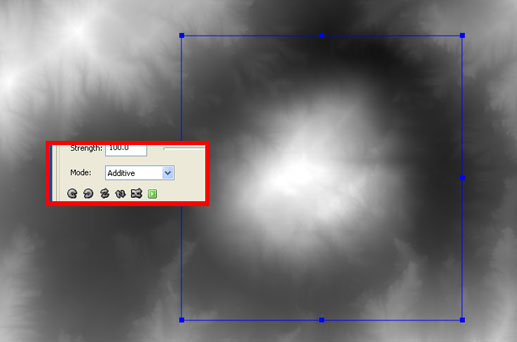
When you import the height map into WorldEditor the alternative layering mode Additive can be used to place the modified height map onto the terrain.The dark texture borders will ensure the mountain is blended into the terrain without causing a hard transition in height.
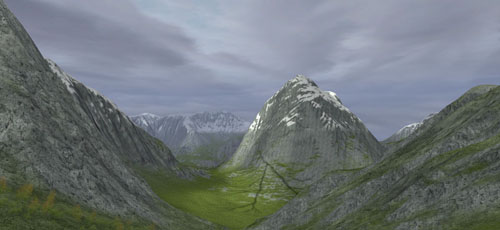
The imported mountain sits where there was once an empty valley.
Copyright 1999-2011 BigWorld Pty. Ltd. All rights reserved. Proprietary commercial in confidence.

