Importing a new character
- Adding an animation to a model
- Viewing the animation and altering its frame rate
 Per-node animation blending
- Compressing animations
Importing a new characterAdding an animation to a model Viewing the animation and altering its frame ratePer-node animation blendingCompressing animations Importing a new character
To export a model from 3ds Max or Maya into ModelEditor, follow the steps below:
1 Open ModelEditor.
2 Select the File→Open Model menu item, or use
the Ctrl+O keyboard shortcut, to display the file browser.
3 Specify the model that was exported, then click the Open button.
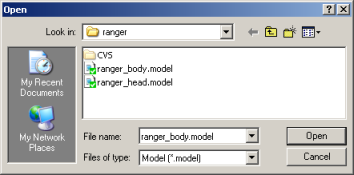
Ranger model file chosen in the file browser
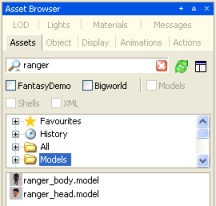
 Alternatively, you can use the
Asset Browser panel. Select the Assets tab, then enter the
name of the model in the search field. Use the virtual folders to filter
between things like shells, particles, and models. Once you have located your
asset, double-click or drag it to the viewport.
Alternatively, you can use the
Asset Browser panel. Select the Assets tab, then enter the
name of the model in the search field. Use the virtual folders to filter
between things like shells, particles, and models. Once you have located your
asset, double-click or drag it to the viewport.
4 The chosen model will be displayed in ModelEditor's viewport.
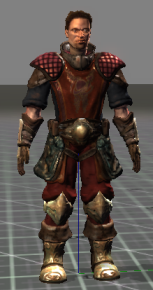
Ranger model in the viewport
5 You can overwrite the model's thumbnail via the Create
Thumbnail ( ) toolbar
button.
) toolbar
button.
The thumbnail image is stored with the visual file in the same folder, and saved as a JPEG.
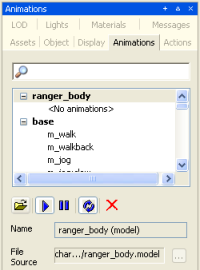
Adding an animation to a model To add an animation to a model in ModelEditor, follow the steps below:
1 Select the Animations tab.
2 Click the  button.
In the example above, all
animations have been added to a LOD model used by the ranger. Models can share
animations by sharing a common LOD model containing those animations. For
details on sharing animations via LODs, see the section
Animation tree – Using LOD models to
share animations.
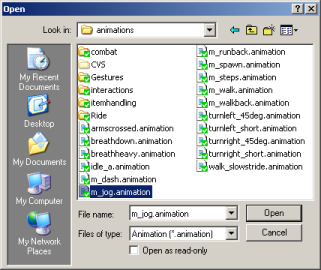
3 In the Open dialog box, specify the desired
.animation file.
Providing that the skeletal hierarchy and naming convention are the same as the hierarchy of your model, the animation should play.
Alternatively, you can add animations to a model by dragging animations from the Asset Browser to the animation window.
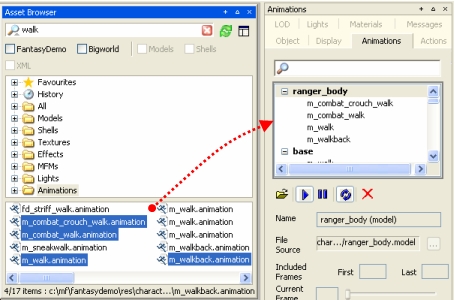
Dragging animations from the Asset Browser panel to the Animations panel
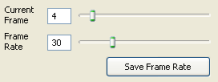
Viewing the animation and altering its frame rateThe controls for play and stop affect only the currently selected animation. The way the animation plays will be determined by the various other settings found in the Animations panel.
The Current Frame slider allows you to inspect the frames individually, much like the time slider in 3ds Max. There is also the Frame Rate slider, which adjusts the playing speed for the animation. Frame rate changes can be saved to the animation, so that changes are reflected within the game. To do that, click the Save Frame Rate button, then save the model.
The Loop Animation button
( ) plays the selected
animation continuously, and is a helpful device for inspecting your animations.
Please note that it does not affect how the animation is played in the game
– it is only a preview feature.
) plays the selected
animation continuously, and is a helpful device for inspecting your animations.
Please note that it does not affect how the animation is played in the game
– it is only a preview feature.
You can also set the initial and final frames to include in the animation via the Include Frames fields. This is handy for determining whether frames can be cut out of the sequence.

Per-node animation blendingIn the BigWorld engine, multiple animations can be blended over the top of each other and played at the same time. In order to blend animations successfully, blend values must be given to each node (bone) within the animation. Node Blend values are set within the Animations tab in ModelEditor.
Let us compare the two animations: holddrink_stand.animation and
m_walk.animation, which are successfully blended in the FantasyDemo
when a character walks whilst holding a cup.
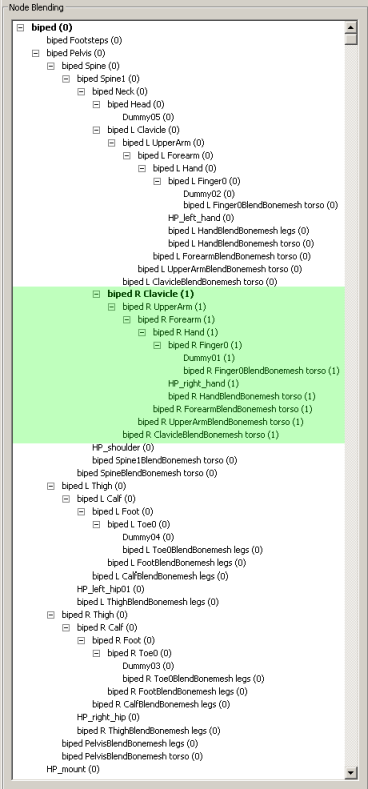
As you can see from the diagram below, the important nodes in the
holddrink_stand.animation are the ones in the right arm. If you did
not use those nodes, then you would drop the drink. To signify the importance of
these nodes, all nodes from biped R Clavicle down the right arm are
given a weighting of 1.0, while the nodes in the legs (that play no part
in the holddrink animation) are given a weight of 0.0.
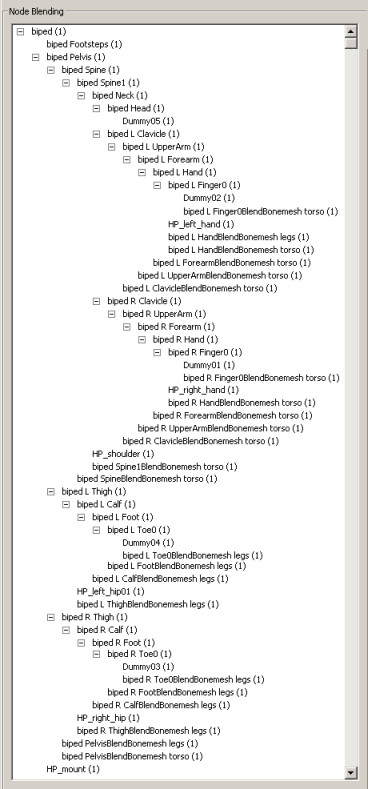
The m_walk.animation however, requires that almost every node be
given some weighting. When a character walks, nearly all bones in the body move.
Node Blending values do not effect the strength of an animation when only a single animation is being played. So if a particular node within an animation is given a Node Blending value of 0.01, then it will play exactly as it is seen in your 3D package, providing no other animation is being played at the same time. However, as soon as another animation is introduced, the node blend values of the combined animations are determined, and a blended animation will result.
A Node Blend value of 0.0 is a special case – when a node is given a blend value of 0.0 it will not animate, even if it is the only animation playing at the time.
Node Blend values for |
Node Blend values for |
Not all animations can successfully be blended together to give a visually
appealing result. Our artists tried, unsuccessfully, to get a
Stand_Shoot_gun.animation to blend with a Run.animation,
until someone pointed out that a person shooting a gun whilst running looks
nothing like a person standing and shooting a gun, or a person running. In
this case a new Run_withgun.animation had to be created.
The settings in the Actions panel determine which animations can play at the same time. For further information on this panel, see section Modify Animations with Actions.
Blend values greater than 1.0 can be assigned to a node to give it more weight when blending by manually entering a higher value in the blend value dialog.
Its important to recognise that strong node blend values will effect the blend in and blend out times between actions. In the diagram below a node with a strong blend weight in Action A will still be the strongest influence at the time marker ![]() , if blending with a significantly less weighty node.
, if blending with a significantly less weighty node.
If you are previewing a skinned
object, then you will probably see a series of BlendBones listed in
the Node Blending display. These are required by the engine for animating skinned objects and can be ignored by the artist.
Blend bonesIn the Node Blending panel of the Animation tab you may see extra bones in your rig with the prefix "BlendBone"
Blend bones are used by the engine to handle vertices influenced by multiple bones (Soft Skinning). Each bone is converted from world space into skin space, creating a blend bone. Blend bones do not contribute to the visual splitter's 17 bone limit or the 256 bone maximum for hardware skinning so their contribution can be safely ignored.
Compressing animationsThe BigWorld Engine automatically compresses animations. The animation compression facility within ModelEditor allows animators to adjust these compression settings using a visual tool that shows changes to compression in real time.
Animation compression is important as it improves game performance. It also allows animators to import animations that use more key frames and more precision.
When animations are loaded into ModelEditor they will have a default amount of compression applied to them. This compression value has been optimised to give maximum compression without visual artifacts. Up to 80% compression is performed automatically by this automated process.
Although the automatic compression has been highly optimised, we suggest going through each animation manually and adjusting the values using the visual feedback tool (described below). Nothing beats the eye of an animator. This way you might reduce the file size slightly, improving game performance.
To compress an animation, follow the steps below:
1 Open the model in ModelEditor.
2 In the Animations tab, select the desired animation to be compressed.
3 In the Compression Settings group box, click the
 to view the real time
compression.
to view the real time
compression.
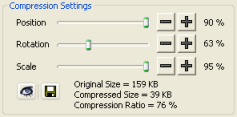
4 Increase the compression with the sliders, and you will notice that a wire frame representation of the model maintains the 0% compression, while the shaded model displays the animation as it would appear after compression. This allows the animator to choose the appropriate level of compression. Simply play with the compression percentage until the compression is satisfactory, usually when the wire frame model is just visible under the shaded model.
Do not worry about losing animation data by using the
compression facility. This compression does not write over the original
animation file – all compressed animation data is written to a separate
.anca file, leaving the original .animation
file intact. So if you decide at a later date that 80% compression on a run
animation is too much, you can easily reduce it to 70% without having to
re-export your animation.
A display at the bottom of the compression rollout indicates how many keys have been compressed and the difference in file size.
Copyright 1999-2011 BigWorld Pty. Ltd. All rights reserved. Proprietary commercial in confidence.